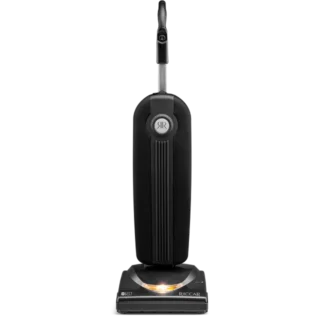
Dyson Upright Ball full service and maintenance
I’ll guide you through a full service on a Dyson Ball vacuum cleaner. This process will not only involve cleaning various components of the machine but also focus on crucial areas that often cause problems, like the power head. By the end of this service, your Dyson will be working like new.
Step 1: Review the Service Request
Before starting, always check the service ticket. For this Dyson, we’re performing a full service, including authorized filter replacement. Remember, clean filters are crucial for optimal performance, so replacing them is preferable over washing.
Step 2: Initial Machine Check
The machine didn’t turn on during check-in, likely due to overheating. First, power it on and listen for any unusual sounds. A loud whine usually indicates a clogged HEPA filter, which we’ll address later.
Step 3: Inspect and Clean the HEPA Filter
Remove the HEPA filter and turn on the machine again to see if the noise disappears. If it does, the filter is likely clogged. This customer has authorized a replacement, so we’ll proceed with that.
Step 4: Service the Power Head
Let’s start with the power head, which can be easily removed by sliding off the clip. Once off, remove the baseplate held by plastic tabs. Inspect the baseplate for debris, especially around the springs, and clean it thoroughly. Washing the baseplate in the sink is quick and effective.
Step 4a: Disassemble the Brush Roller
Remove the four Phillips screws holding the end caps of the brush roller. Carefully lift the end caps and remove the brush. Next, use a T15 torx bit to remove the end caps from the brush roller and clean out any debris. This is crucial as debris buildup can cause the brush roller to melt or lock up.
Step 4b: Clean and Grease the Bearings
Once disassembled, clean the bearings thoroughly. Apply a silicone-based grease to the bearings and the areas where hair and debris tend to accumulate. This helps prevent future clogs and extends the life of the power head.
Step 5: Reassemble the Power Head
After cleaning, reassemble the brush roller and bearings. Ensure all parts are aligned correctly, then reattach the baseplate and the power head to the machine.
Step 6: Clean the Upper Body and Canister
Remove the canister and dump out any debris. The cyclone assembly can be blown out with an air compressor, but washing may be necessary for more stubborn dirt. Also, inspect the gasket for any water that may have gotten underneath and dry it out thoroughly.
Step 7: Clean the Main Body
Blow out the main body with an air compressor to remove dust and debris. Then, use denatured alcohol and a Scotch-Brite pad to clean any paint marks or scuffs, especially around the ball and sides. Follow up with a basic all-purpose cleaner for a final polish.
Step 8: Reassemble the Machine
With all components clean and dry, reassemble the vacuum. Start by attaching the power head, ensuring the electrical pins are aligned correctly. Then, place the cleaned canister back on the machine.
Step 9: Final Test and Documentation
Perform a final test to ensure everything is functioning correctly. We use deodorizing crystals for the test, which helps absorb odors and leaves a light fragrance. Check the brush roll, suction, and the changeover valve to make sure they are operating smoothly.
Finally, document the service performed, including any concerns, like the condition of the brush bearings. With the service complete, your Dyson Ball should now be as good as new!