Dyson DC14 Full Service
Over time, the Dyson DC14 and similar models experience a decline in performance due to worn-out components, particularly the clutch, filters, and lower hose. While suction loss is a common concern, the real issue often lies in the brush roll system and clogged filters. This guide provides a step-by-step repair process, ensuring your Dyson vacuum operates at peak efficiency. This service guide applies to Dyson DC14 models, and is very similar to DC07 and DC33 models.
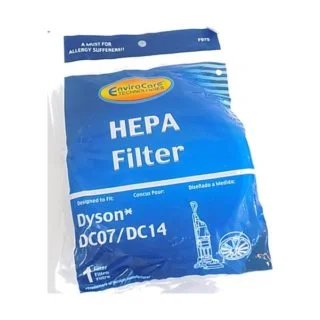
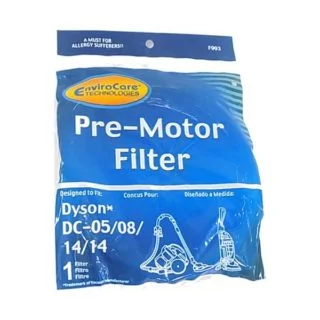
What parts do you need?
We sell high-quality replacement parts to ensure long-lasting and effective repairs! You can also check the schematic page for this vacuum cleaner.
How do I know when to...
Service My Dyson DC14?
Low Suction
If your Dyson DC14 isn’t picking up debris as effectively as it used to, clogged filters, blocked hoses, or a worn-out lower hose may be the cause. A quick check of the pre-filter and HEPA filter can help determine if they need replacement. Ensuring proper airflow is key to restoring full suction power.
Odors
A musty or burning smell from your Dyson is often caused by a clogged HEPA filter, trapped debris in the brush roll, or overheating motor components. Replacing the filters and thoroughly cleaning the brush roll area can help eliminate unwanted odors and improve performance.
Loud Noises
Grinding, rattling, or whining noises typically indicate worn bearings, a stretched belt, or a failing clutch. If the brush roll stops spinning under pressure, the clutch may need replacement. Identifying and addressing these sounds early can prevent further damage.
It's Been Awhile
If your vacuum hasn’t been serviced in over a year, filters, belts, and hoses may have degraded, reducing cleaning efficiency. Regular maintenance, including filter replacement, brush roll cleaning, and clutch inspections, ensures long-term performance and prevents costly repairs.
Let's get down to business...
Step-by-Step Repair Guide
Step 1: Initial Assessment
Before beginning repairs:
- Power on the vacuum and listen for unusual noises.
- Check brush roll function – If it stops spinning on contact with the carpet, cleaning performance is significantly reduced.
- Assess suction strength – Weak suction is often caused by clogged filters or airflow obstructions rather than motor failure.
Key Insight: The brush roll is responsible for over 50% of cleaning efficiency, making it a primary focus of repairs.
Step 2: Removing and Replacing Filters
- Detach the canister for access to the filters.
- Carefully remove the HEPA filter to avoid breaking the fragile plastic tabs. Dyson labels these as “lifetime” filters, but they degrade over time.
- Compare old and new filters – The difference in airflow restriction is often significant.
- Install new filters, ensuring proper placement for maximum efficiency.
Recommendation: Filters should be replaced annually for optimal performance, even if Dyson markets them as permanent.
Step 3: Accessing the Brush Roll Chamber
- Remove the base plate to expose the brush roll and belt system.
- If the belt is intact but the brush isn’t spinning, the issue is likely due to a worn clutch.
- Cutting the old belt can make removal easier.
Tip: The Dyson DC14 uses a two-belt system with a clutch mechanism, which protects the belt when resistance is encountered. However, these rubber belts stretch and wear out, leading to poor brush roll performance.
Step 4: Clutch Removal and Replacement (If Needed)
- Use caution when removing the clutch, as older Dyson models have brittle plastic components.
- The brush bar housing is held in place with snap-in pieces that can break easily. If damaged, replacing the entire housing may be necessary, which can be costly due to discontinuation.
- Lubrication for removal:
- Some recommend using oil to help components slide out more easily.
- Isopropyl alcohol is a cleaner alternative that evaporates without leaving residue.
Important: Applying too much force can result in irreversible damage to the vacuum housing. We have a full guide on replacing your Dyson clutch assembly here.
Step 5: Lower Hose Replacement (If Needed)
- Remove the old hose – Older hoses retain their shape, leading to airflow inefficiencies.
- Install a new hose, which improves suction and allows the vacuum head to maintain better contact with the floor.
- Ensure proper attachment to avoid air leaks.
Step 6: Cleaning and Greasing Components
- Disassemble the brush roller by removing the four Phillips screws securing the end caps.
- Clean accumulated debris inside the brush roller housing.
- Lubricate the bearings with silicone-based grease to ensure smooth operation and prevent overheating.
- Check for melted debris, which can restrict roller movement.
Step 7: Reassembly and Final Adjustments
- Reinstall the clutch and secure all components.
- Test belt alignment by manually rotating the brush roll before powering on the vacuum.
- Ensure the power head and brush roller are aligned properly to prevent unnecessary strain on the belts.
Step 8: External Cleaning
- Use denatured alcohol and an all-purpose cleaner to remove dirt, scuffs, and paint flecks from the vacuum’s exterior.
- Blow out debris from the main body with a shop vacuum or compressed air.
- Polish the surface for an improved appearance.
You also might need...
Other Items for This Repair
While completing this repair, you should check these other important items on your vacuum cleaner to ensure the best possible performance and longevity!
Final Thoughts
A properly serviced Dyson DC14 can perform like new with routine maintenance and timely part replacements. Key components such as the clutch, filters, and brush roll play a major role in suction and overall cleaning performance.
By following this step-by-step guide, any Dyson owner can restore their vacuum’s efficiency and extend its lifespan. For complex repairs or replacement parts, professional service may be necessary.
Need More Stuff?
We offer comprehensive part diagrams and repair tutorials to help you keep your vacuum running at its best. VacuumsRus is your one-stop-shop for anything vacuum cleaner related!
Schematics and Parts Diagrams
You can find the schematics for each model this repair is applicable to here:
Schematic and parts list for: Dyson Model: DC33
Schematic and parts list for: Dyson Model: DC07
Schematic and parts list for: Dyson Model: DC14


