Dyson Sealing Ring Fix
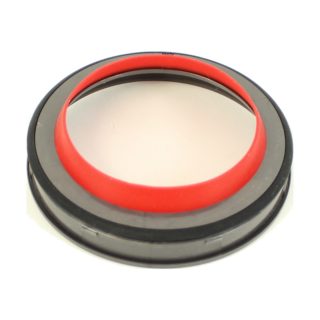
This guide addresses a common issue with Dyson stick vacuums, particularly the V10 and SV12 models, where the seal ring in the dustbin falls out. While reinserting the old seal is possible, it is often ineffective due to broken clips, which typically cause the seal to detach in the first place. Instead of using glue as a temporary fix, replacing the seal with a new, upgraded version is a more reliable and long-term solution.
What parts do you need?
We sell high-quality replacement parts to ensure long-lasting and effective repairs! You can also check the schematic page for this vacuum cleaner.
How do I know when to...
Replace my Dyson stick vacuum sealing ring?
Dirt Cup Wont Close
If the dirt cup won’t latch properly, the sealing ring may have fallen out or lost its shape. A damaged or missing seal prevents an airtight closure, causing debris to leak and reducing suction efficiency. Replacing the sealing ring ensures a secure fit and optimal performance.
Ring is Unattached
If the sealing ring has fallen out of place, it’s likely due to worn or broken clips that can no longer hold it securely. Attempting to reinsert the old ring may not work, as the weakened clips will continue to fail. Installing a new, upgraded sealing ring is the best solution to restore proper function.
Sealing Ring is Frayed
A frayed or deteriorating sealing ring can compromise the vacuum’s suction and dust containment. Over time, wear and tear cause the material to degrade, leading to air leaks and reduced efficiency. A replacement seal prevents dust from escaping and keeps the vacuum operating at peak performance.
Let's get down to business...
Step-by-Step Repair Guide
Step 1: Remove the Dustbin
- Open the Dustbin: Start by opening the dustbin as you would when emptying it.
- Release the Dustbin: You’ll find a small latch with an arrow on it. Push this button, and the dustbin will pop right off.
Step 2: Remove the Old Seal
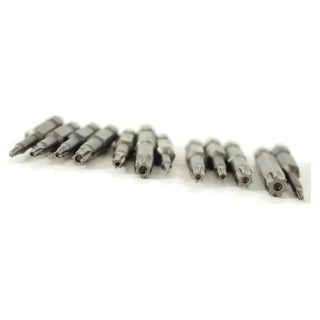
- Locate the Screw: You’ll see two screws. Ignore the upper one and focus on the lower screw holding the seal. This is the one you’ll need to remove with a T8 screwdriver.
- Detach the Seal: After removing the screw, look at the side with the clips. Pull from this side, wiggling it slightly until it pops out. Be aware that the other side has a stud where the screw was, so you’ll need to pull from the clip side first.
Step 3: Install the New Seal
- Insert the Stud: Take the new seal and insert the stud on the side where the screw goes.
- Clip the Seal: Align the clips on the opposite side and press firmly until you hear a click, indicating they’re securely in place. You may need to walk the seal back and forth to get it fully seated.
Step 4: Reattach the Dust Bin
- Screw It Back In: Once the seal is in place, reinsert the screw to secure it.
- Test It: Open and close the dustbin to make sure everything is functioning correctly. The new seal should stay in place.
You also might need...
Other Items for This Repair
While completing this repair, you should check these other important items on your vacuum cleaner to ensure the best possible performance and longevity!
Final Thoughts
Replacing the dustbin seal ring on Dyson V10 and SV12 stick vacuums is the most effective solution to prevent future issues. Attempting to reuse the old seal often leads to poor performance due to broken clips, making a new, upgraded seal the best long-term fix. Properly installing a replacement ensures a tight seal, maintains suction efficiency, and extends the vacuum’s lifespan. Regular maintenance and timely part replacements help keep Dyson stick vacuums performing at their best.
Need More Stuff?
We offer comprehensive part diagrams and repair tutorials to help you keep your vacuum running at its best. VacuumsRus is your one-stop-shop for anything vacuum cleaner related!
Schematics and Parts Diagrams
You can find the schematics for each model this repair is applicable to here:
Schematic and parts list for: Dyson Model: v10 SV12 SV27
Schematic and parts list for: Dyson Model: v10 SV12 SV27


