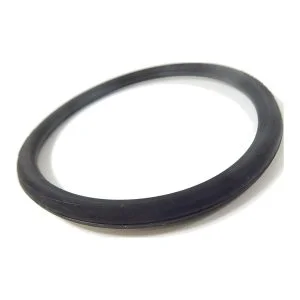
Are you the proud owner of a Sanitaire Commercial Vacuum Cleaner? If so, then you know how powerful and reliable these machines are. But like all appliances, proper maintenance is key to keeping your vacuum running its best for years to come. One task that should be done regularly on any vacuum cleaner is changing the belt. It’s easier than it sounds – and this article will show you how! Read on to learn exactly what needs to be done in order to make sure your Sanitaire commercial vacuum cleaner has a new belt and continues working at peak performance.
For many homeowners, an essential part of their cleaning routine is using a good quality vacuum cleaner – but with regular use comes wear and tear on certain parts. That’s why it’s important to stay up-to-date with maintenance tasks such as replacing the belts in your Sanitaire Commercial Vacuum Cleaner. Not only does changing out worn or broken belts help keep your machine running smoothly; it also helps maintain suction power for efficient dirt removal from carpets, rugs, furniture and other surfaces around your home.
In this article we’ll walk through step-by-step instructions on how to replace the belt on a Sanitaire Commercial Vacuum Cleaner – quickly and easily! After reading this guide, you’ll have all the knowledge needed to keep your machine functioning optimally without having to call in a professional technician every time something goes wrong. So let’s get started!
Preparing To Change The Belt
The belt of a commercial vacuum cleaner, much like the beating heart of an engine, is essential to keep everything running smoothly. Without it, all functions come to a halt; replacing it is thus crucial for ensuring optimum performance. Prepping this vital piece of machinery can be intimidating, but taking on the challenge with care and confidence makes it manageable.
First things first: unplugging the machine from its power source to prevent electrical shock or injury. Then, check to ensure that there is no damage to the Sanitiare fan, as this should be replaced while you are working on the machine. Next up, locate where exactly the belt runs around – usually indicated by two arrows pointing towards each other at either end of the roller brush cylinder- and check whether there are screws holding down the cover plate which must be removed before proceeding further. With these steps out of the way, one is now ready to move onto…
Removing The Old Belt
Changing the belt on a Sanitaire commercial vacuum cleaner is like performing an intricate dance. You must execute each step with precision and grace in order to ensure success. Removing the old belt is no different; it’s all about paying attention to detail as you go along.
Start by unplugging your vacuum from the wall outlet, then carefully remove any debris or attachments that are connected to the machine. Next, flip over your vacuum so that you can access the underside of the unit where the belt is located. Depending on your model, you may need to use a screwdriver to loosen one or more screws in order to get better access to the motor housing and its components.
Now take note of how everything is put together: which way does the belt loop around? How does it connect? This will help make installation of a new belt much easier once you have removed this one. Once everything has been noted, gently pull away at both ends of the old belt until it disconnects completely from its connection points. Now your vacuums’ old belt should be free, ready for removal and replacement! Now is also the time to make sure that you have a new Sanitaire bag installed in the machine for peak performance once the new belt is installed.
Carefully set aside your old belt and prepare yourself for installing a brand-new one…
Installing The New Belt
Replacing the belt of a Sanitaire Commercial Vacuum Cleaner is an easy task that can be done with minimal fuss. To make sure your vacuum cleaner runs as efficiently and effectively as possible, it’s important to maintain its parts regularly – like changing the belt! With this in mind let’s move onto installing the new belt.
First things first: get yourself situated by placing the vacuum on its side so you have access to the brushroll area where the old belt was removed from earlier. Next take out your new belt and loop it around both ends of your motor spindle – but don’t worry if it feels a bit tight at first; once tensioned correctly, everything will feel nice and snug. Finally (and here’s where we really bring home our mission) wrap any excess length of the belt around itself securely before putting back all relevant covers or panels to complete installation.
Simply put, replacing a worn-out Sanitaire Commercial Vacuum Cleaner belt doesn’t need to be a daunting experience. As long as you follow these steps carefully and methodically, you’ll soon notice improved suction power within minutes! So why wait? Get ready for smoother vacuuming sessions ahead by swapping out those belts now!
Conclusion
It’s important to remember that changing a belt on a Sanitaire commercial vacuum cleaner is not an overly difficult task. With the right tools and some simple instructions, anyone can get the job done with minimal effort.
After taking all of the necessary steps to prepare for the new belt installation, removing the old one, and installing the new one correctly, you’ll be back up and running in no time! The feeling of accomplishment that comes from completing this DIY project is unparalleled—it’s truly like riding a wave of success.
So don’t let anything stand between you and your clean home; take charge and change out that old belt today! You’ll thank yourself later when you’re enjoying fresher air in your living space and have saved money by avoiding expensive repairs or replacements.
