Belt and Brush Roll Replacement / Servicing for Oreck Conquer

The Oreck Conquer Vacuum is celebrated for its lightweight design and powerful cleaning capabilities. To maintain optimal performance, regular maintenance, including changing the brush roll and belt, is essential. If you notice a decrease in cleaning efficiency or if the brush roll or belt shows signs of wear, it’s time for a replacement. In this comprehensive guide, we’ll take you through the step-by-step process of changing the brush roll and belt on an Oreck Conquer Vacuum.
This guide is relevant to all Oreck Conquer, Command, and Control models.
Changing the Belt and Brush on your Oreck Conquer Vacuum
Before you begin, you’ll want the following items:
- Replacement brush roll (compatible with Oreck Conquer)
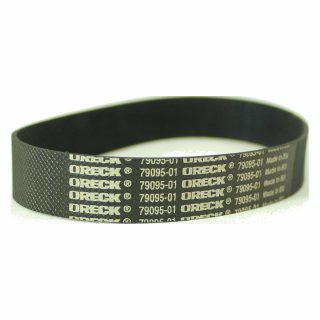
- Replacement belt (compatible with Oreck Conquer)
- Phillips screwdriver
- Flathead screwdriver
- Scissors
- Work surface or clean area
Below you can find the flow indicator, which may be needed. for the repair in question along with some better shampoo to use inside your carpet cleaner that won’t clog your machine!
If the parts listed are not correct for your model, click here to be directed to our schematics / parts list page where you can search your Oreck model to find the right parts that you need.
Below is a full video tutorial with our authorized Oreck technician where he shows you how to complete this repair.
How to Replace Belt and Brush Roll on Oreck Conquer
Step 1: Prepare Your Work Area
Before starting the replacement process, ensure that your Oreck Conquer Vacuum is unplugged from the power source. Place the vacuum on a clean and stable work surface with easy access to the underside.
Step 2: Remove the Bottom Plate
Turn the Oreck Conquer Vacuum upside down to expose the underside. Locate the screws securing the bottom plate and use a Phillips screwdriver to remove them. Set aside the screws in a small container to prevent misplacement.
Step 3: Access the Brush Roll and Belt
Once the bottom plate is removed, you’ll have clear access to the brush roll and belt. Take note of the belt’s position and how it is connected to the brush roll and motor shaft.
Step 4: Remove the Old Belt
Using a flathead screwdriver, gently disengage the old belt from the motor shaft and brush roll. Carefully slide the brush roll out of its housing.
Step 5: Install the New Belt
Take the replacement belt and loop it around the motor shaft, ensuring it sits securely in the belt groove. Slide the other end of the belt over the brush roll, making sure it fits into the designated groove.
Step 6: Install the New Brush Roll
Place the replacement brush roll into its housing, ensuring that it aligns properly with the belt and the brush roll housing. Make sure the brush roll spins freely.
Step 7: Secure the Bottom Plate
Position the bottom plate back over the brush roll and belt assembly. Secure it in place by tightening the screws you removed earlier. Ensure that the plate is snug to maintain proper alignment.
Step 8: Test the Vacuum
Plug in your Oreck Conquer Vacuum and turn it on to ensure that the new brush roll and belt function correctly. Test the vacuum on various surfaces to confirm its cleaning efficiency.
Conclusion:
Changing the brush roll and belt on your Oreck Conquer Vacuum is a straightforward process that can significantly enhance its cleaning performance. Regular maintenance, including timely replacements of worn-out parts, ensures the longevity and reliability of your vacuum cleaner. If you encounter any difficulties during the process or are unsure about any step, consult your vacuum’s user manual or seek professional assistance. By caring for your Oreck Conquer, you can enjoy efficient and hassle-free cleaning for years to come.


