How to Fix Shark Duo Clean Front Brush Roll Not Spinning – Shark Repair Guide
Shark Brush Roll Repair
If the front (soft) roller on your Shark DuoClean vacuum has stopped spinning, don’t panic—this is a common issue with several possible causes. This guide walks through the most common reasons for the failure and provides a step-by-step process for inspecting and replacing the internal belt. While this tutorial is based on a common DuoClean head design, note that Shark frequently changes models, so your unit may have slight differences.
What parts do you need?
We sell high-quality replacement parts to ensure long-lasting and effective repairs! You can also check the schematic page for this vacuum cleaner.
How do I know when to...
Replace my Shark DuoClean belt?
Front Brush Not Spinning
If the front roller isn’t rotating, it could be due to a broken or stretched belt. This is one of the most common signs of belt failure. If the vacuum is running but the roller remains still, it’s time to inspect and replace the belt.
Burning Smell
A worn or broken belt may slip or overheat, producing a rubbery burning odor. This happens when the motor continues spinning while the belt fails to turn the brush roller. Ignoring this sign can lead to further motor strain.
Loss of Power
While the vacuum may still turn on, a faulty belt can reduce the unit’s cleaning effectiveness. Without proper roller engagement, the vacuum loses agitation and may struggle to lift debris from carpets or rugs.
Let's get down to business...
Step-by-Step Repair Guide
Step 1: Remove Top Cover
- Locate the red clip on the cleaner head and pop it off.
- The cleaner head will detach easily.
✅ This is the easiest part of the repair—don’t be fooled!
Step 2: Remove Top Screws
- Unscrew the ball cover using a half-turn motion.
- Lift the cover to remove the filter underneath.
- Flip the vacuum over to access the lower components.
Step 3: Remove Bottom Screws
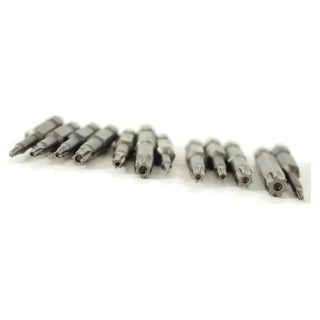
- Use a T8 Torx screwdriver to remove six screws securing the lower housing.
- Slide the panel to reveal two additional silver T10 screws near the hose.
- Remove the two black T8 screws to separate the lower housing.
- Locate the small Phillips screw securing the lower hose and remove it.
✅ Be sure to keep screws organized, as different sizes are used throughout the assembly.
Step 4: Lift the Cover
- Carefully pull the hose out from behind the lower assembly.
- Avoid removing the white gear mechanism, as it is difficult to reattach.
- Pry the plastic ring clip to release the hose from the mount.
- The hose is glued in place—use a knife or pliers to cut through the existing material.
Step 5: Inspect the Belts
- Remove all remaining glue and debris from the hose connectors using a pick tool or knife.
- Ensure the grooves are completely clean to allow a snug fit for the replacement hose.
- Avoid using solvents, as they can weaken the plastic and cause damage over time.
Step 6: Remove the Soft Roller
- Apply flexible adhesive inside the connector grooves.
- Thread the new hose onto the connectors by turning it until it reaches the built-in stop.
- Ensure the hose clips align properly with the slots on the vacuum body.
- Let the adhesive set briefly before proceeding to final assembly.
Step 7: Replace the Belt
- Slide the new hose back into position and secure it under the lower panel.
- Reattach the spring to ensure proper tension.
- Reinstall the small Phillips screw to secure the hose in place.
- Carefully reattach the lower assembly, aligning all clips and grooves correctly.
- Install the four silver T10 screws first, ensuring the housing is stable.
- Reattach all black T8 screws to secure the ball cover.
Step 8: Reassemble the Head
- Reinsert the ball filter and secure the cover with a half-turn motion.
- Reattach the cleaner head, ensuring the red clip locks securely.
- Inspect the hose to ensure proper fit and movement when reclining.
Step 9: Reinstall the Wheels and Roller
- Reinsert the ball filter and secure the cover with a half-turn motion.
- Reattach the cleaner head, ensuring the red clip locks securely.
- Inspect the hose to ensure proper fit and movement when reclining.
You also might need...
Other Items for This Repair
While completing this repair, you should check these other important items on your vacuum cleaner to ensure the best possible performance and longevity!
Final Thoughts
Repairing a non-spinning front roller on a Shark DuoClean vacuum is manageable with the right tools and replacement parts. While Shark vacuums are often built with proprietary designs that complicate DIY repairs, this guide helps demystify one of the most common issues—belt failure. Restoring your roller functionality helps maintain strong suction and prevents costly replacements.
Need More Stuff?
We offer comprehensive part diagrams and repair tutorials to help you keep your vacuum running at its best. VacuumsRus is your one-stop-shop for anything vacuum cleaner related!
Schematics and Parts Diagrams
You can find the schematics for each model this repair is applicable to here:
Schematic and parts list for: Shark Model: AX950 AX952
Schematic and parts list for: Shark Model: ZU780, ZU782, ZU785
Schematic and parts list for: Shark Model: AZ1000, AZ1000W, AZ1001, AZ1002, AZ1002BRN, AZ1002C, AZ1002NP, AZ1003, AZ1003BRN


